In this article, you'll learn about the publishing workflow in DXM, how to publish content, what dependencies are and how they impact publishing, how to schedule publishing, viewing published content, and republishing content. You'll also learn how to retire content from DXM.
User scenario
You're a marketer who needs to make the content you've been working on the last few weeks live on the company website in time for the next release. Using the DXM workflow, you transition your site pages and images from the draft status to the live workflow state so that your clients can read more about the latest release on the website. You also use the scheduling feature to automatically schedule content to post to the website over the weekend to prep for Monday's promotional launch.
Publishing overview
In order to publish content in DXM to a live website, you’ll use something called a workflow. Workflows represent the lifecycle of an asset in DXM and every asset is associated with a specific workflow and workflow state. When you create new content in DXM, it always begins in the draft workflow state and is not published anywhere until you transition your content from draft to a live state.
To learn more about Publishing, see DXM Getting started guide.
How to publish content
To publish content in DXM:
- From the File View, locate the asset you wish to publish.
- From the opened asset, click the Workflow drop-down.
- Select the next available stage in your workflow to publish your asset to that environment. Depending on your DXM site up, you may see different states in your workflow.
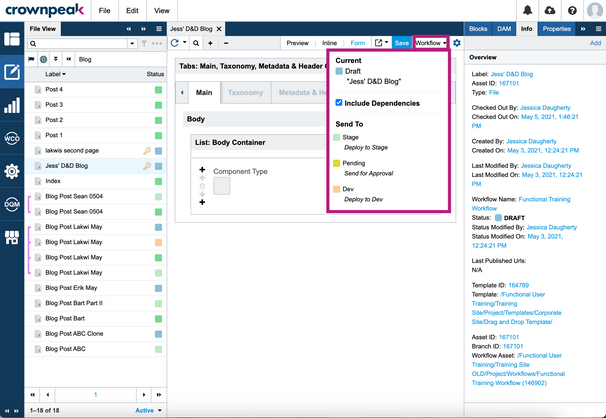 Workflow drop-down
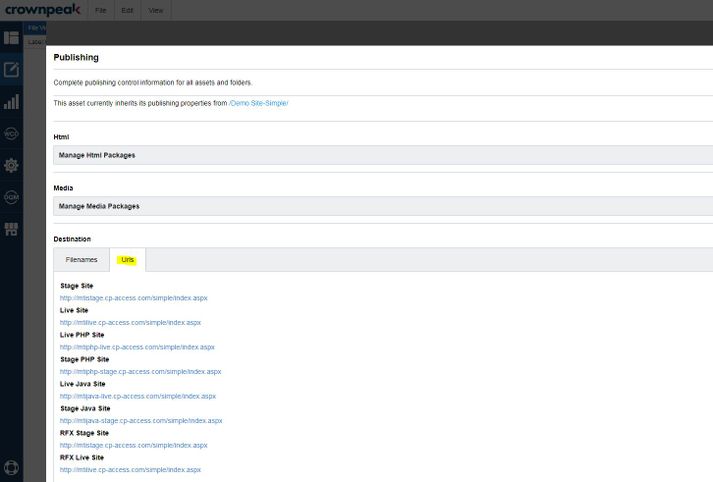
- Ensure that the asset is viewable in the workflow state you just published it to. You can confirm this by clicking the Last Published Urls drop-down and selecting that workflow state to view the asset.
 Last Published Urls
To learn more about publishing an image, see Working with images in DXM.
Publishing multiple assets by template
To publish multiple assets based on a certain template:
- From the File View, right-click any asset using the template you wish to publish multiple of.
- Select Route.
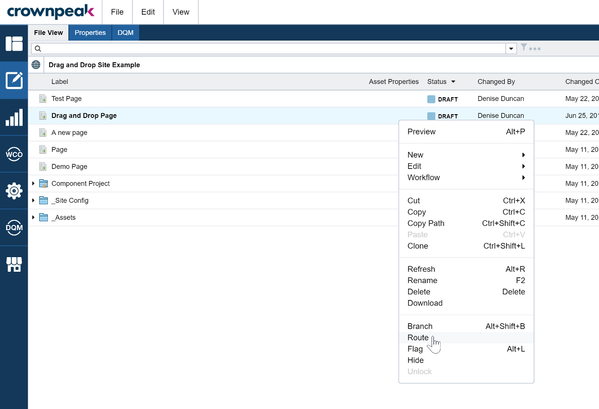
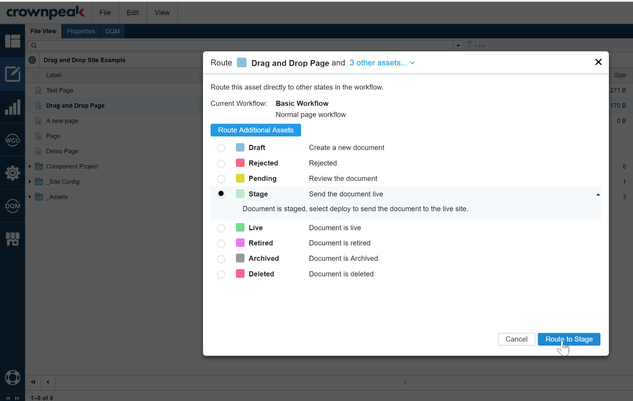
- From the Route dialog, click Route Additional Assets.
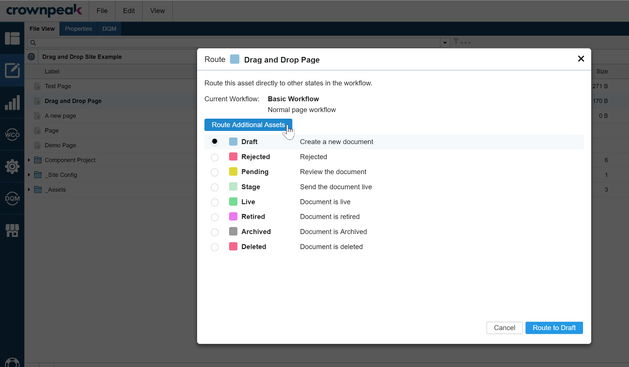
- Set the Relate search to field to the folder containing the files you want to move and choose Templates for the Relate By drop-down.
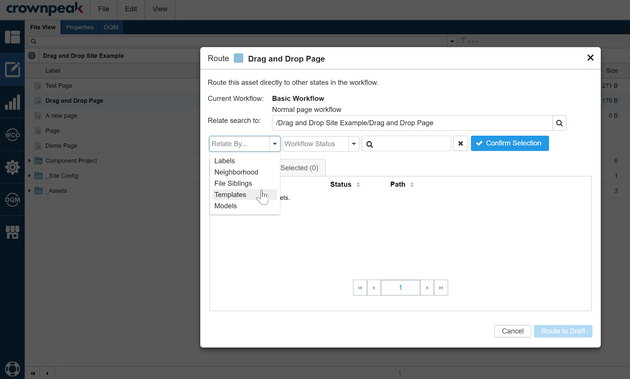
- Set the Workflow Status dropdown to filter assets that are in a specific state state and check all assets you want to route.
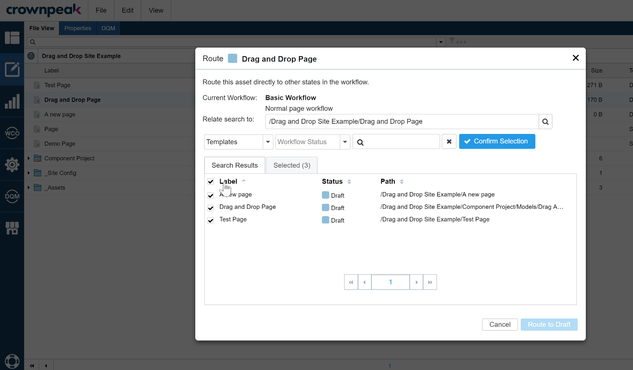
- Click Confirm Selection.
- Select the state to route all selected assets to and click Route To {State}.
Dependencies
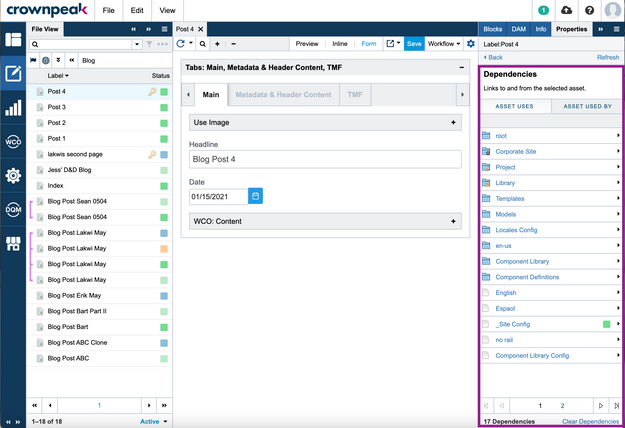
Dependencies are any assets that are linked to or from another asset.
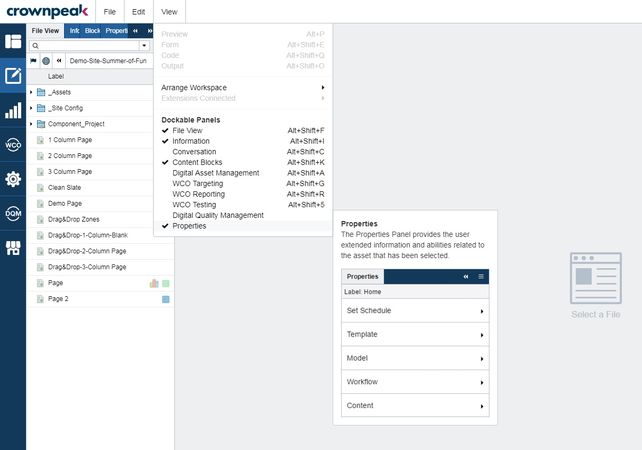
From any opened asset, open the Properties panel > Dependencies. DXM displays all dependencies via the Asset Uses and Asset Used By tabs.
 Dependencies
Publishing an asset with dependencies
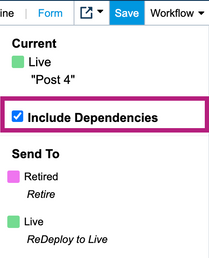
- When publishing an asset, the Include Dependencies checkbox from the Workflow drop-down is selected by default. This means that DXM will automatically include any dependencies in the same workflow state in the publishing process, which may impact publish time. You can locate an asset's dependencies through the Properties panel as shown above.
 Include Dependencies checkbox
- If you're republishing a page due to a minor fix, such as a typo, you may want to deselect the Include Dependencies checkbox to not include dependencies. Doing so may speed up republishing time.
- You can change the default selection of the Include Dependencies checkbox in your user preferences. You will simply need to remember to select or deselect the checkbox, depending on whether they want to include dependencies when publishing an asset.
Scheduling
There are two ways to schedule content to publish content automatically in DXM.
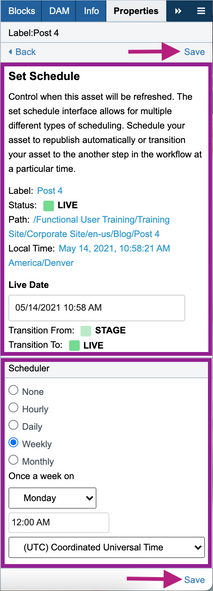
- Set Schedule - Use this option to schedule content to publish to the next environment in the workflow at a set time.
- From the selected asset, navigate to Properties > Set Schedule.
- From the Set Schedule section above in the Live Date picker, select the date and time, then click Save at the top of the panel to activate the scheduler. Note that the time is based on your Local Time settings set in your profile.
- Scheduler - Use this option to republish content to the same workflow state the asset is already in at regular intervals. This is a great option to use if you're making minor changes to a website page that occur at on a regular basis.
- From the selected asset, navigate to Properties > Set Schedule.
- From the Scheduler section below, select a recurring option: None. Hourly, Daily, Weekly, Monthly
- Depending on the recurrence selected, further determine the time, day of week, or recurrence in a month to republish content.
- Click Save at the bottom of the panel.
 Set Schedule
Viewing published content
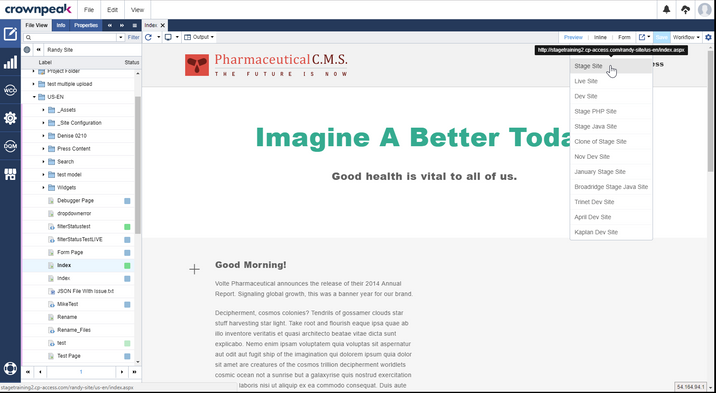
Once content is published to an environment in DXM, you can view that content by clicking the Last Published Urls drop-down and selecting that workflow state to view the asset.
 Last Published Urls
Viewing the published asset's URL
Republishing content
You can republish, or redeploy, content in DXM to the same workflow state if needed. For example, you want to make a minor change to an already live web page and publish the change quickly.
To redeploy content:
- Make the change to the asset.
- Click Save.
- From the Workflow drop-down, click Redeploy to [workflow state]
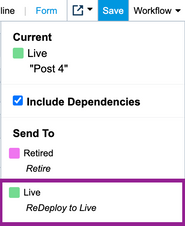 Redeploy content
Retiring existing content in DXM
User scenario
Your organization has decided that they will be sunsetting a feature in your product, so you no longer need to host content about that feature on your site. Use DXM to retire old content so that it no longer appears.
To retire existing content in DXM:
- From the File View, navigate to the asset you wish to retire.
- From the Workflow drop-down, click Retired. The asset will move from a live workflow state to a retired one, in which the asset will no longer be available on your website.
Note: Retired content will still exist in DXM. You can still navigate to retired content from the File View > Hidden content.
Expire content automatically
There are a few ways to automatically expire content:
- Workflow scheduled transition
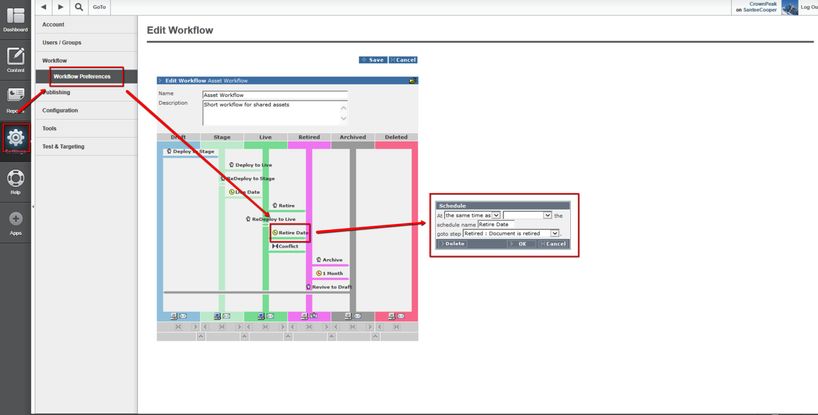

This would require that the workflow be updated with a Scheduled Transition from the Live state to the Retired state:

- Schedule via code using an input field for expiry, i.e.:
asset.SetSchedule("Retire Date",lastEndDate.AddDays(1));
You can insert code in either the post_input.aspx or post_save.aspx and requires a named Scheduled Transition mentioned in the second option.


