In this article, you’ll learn what to prepare for before installing TMF, installing TMF, and some best practice installation scenarios including how to configure TMF to connect with more than one site or be self-contained to support a single site.
To learn more about TMF implementations, see Best practice implementation scenarios for TMF.
Before installing TMF
The Translation Model Framework (TMF) feature allows you to manage multilingual content in DXM. You can easily maintain any type of content or number of sites, whether they are global, regional, or local.
Before installing TMF, it's best to decide where the TMF configuration folder(s) will be installed in your project because TMF supports various project scenarios and can be installed in a single folder or multiple locations. Analyzing the site structure and project requirements are the first step for a successful TMF integration. Review the best practice scenarios below to see which best fits your needs.
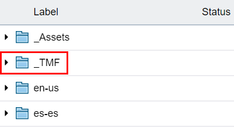
Single TMF configuration folder example:
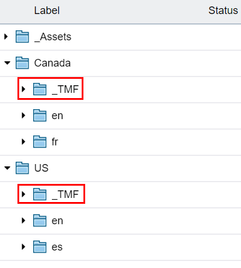
Multiple TMF configuration folders example:
Installing and configuring TMF
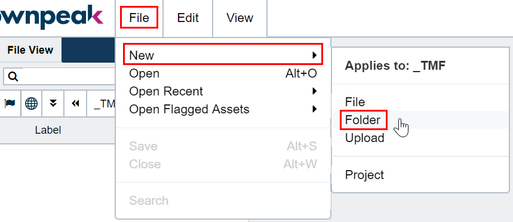
- To install TMF, create a ‘_TMF’ folder by choosing File > New > Folder from the top menu.
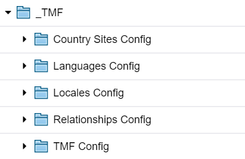
- Create the following folders in the newly created ‘_TMF’ folder. The folder names should be ‘Country Sites Config’, ‘Languages Config’, ‘Locales Config’, ‘Relationships Config’, ‘TMF Config’. When complete, your _TMF folder should look like this:
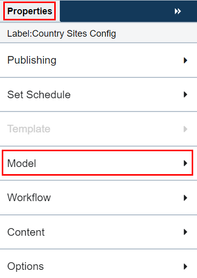
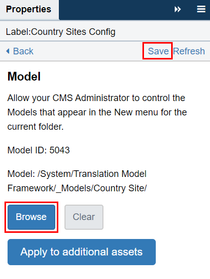
- Select the first folder in the File View. From the Properties panel (accessible via the View menu), apply the correct model by selecting Model, then browse to select the following for each. Make sure to click Save before moving to the next folder.
- Country Sites Config Model: /System/Translation Model Framework/_Models/Country Site/
- Languages Config Model: /System/Translation Model Framework/_Models/Language/
- Locales Config Model: /System/Translation Model Framework/_Models/Locale/
- Relationships Config Model: /System/Translation Model Framework/_Models/Relationship/
- TMF Config: No model assigned
Create configuration assets
Use the models to create configuration assets as needed in the newly created folders. These are steps for each folder.
Country Sites Config
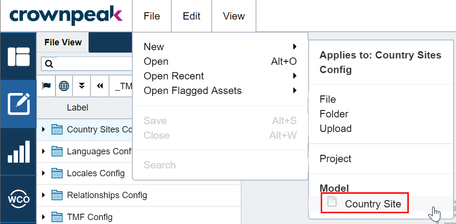
Select File > New > Model > Country Site.
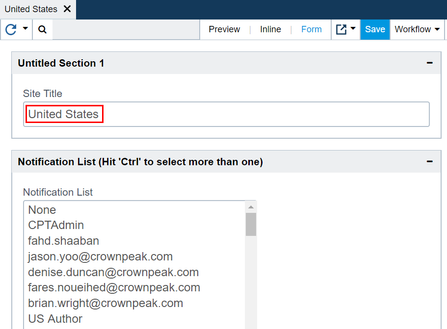
Enter a country name in the Site Title text box. Choose which user(s) will be notified about the content changes via Email.
Languages Config
Select File > New > Model > Language.
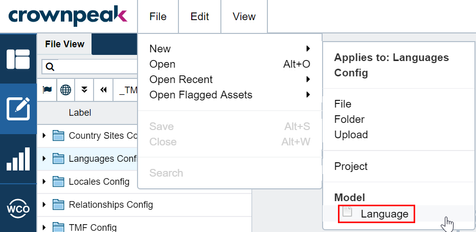
Enter a language name in the Language Title text-box. Choose which user(s) will be notified about the content changes via Email.
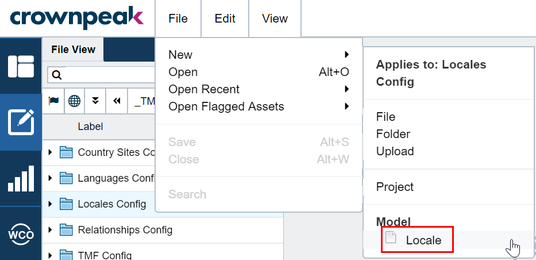
Locales Config
You will need to have configuration assets for all languages and countries before configuring the locale.
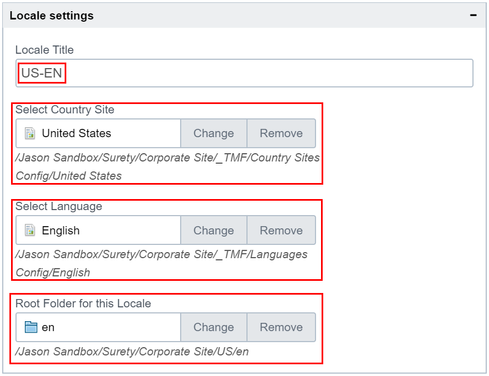
Select the appropriate country, language, and Site Root.
Relationships Config
No action is required. When TMF is triggered, the relationship configuration assets will be automatically created in this folder. This is how TMF keeps the relationships between Source Asset and Destination Asset.
TMF Config
Templates configuration – This configuration reads the entire assets and associated fields within the project. If there are a lot of associated templates and a number of fields, then you may experience some slowness when opening the template configuration asset.
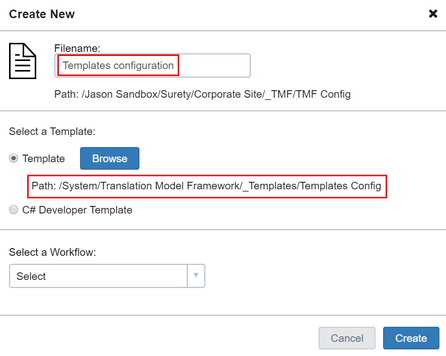
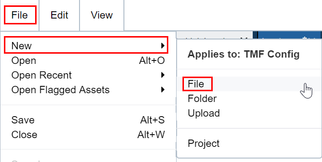
- Create a new file under the “TMF Config” folder.
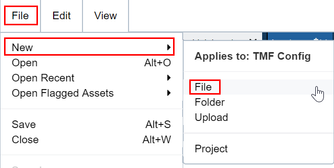
- Enter “Templates configuration” as the Filename. For the Template, select the “Templates Config” at this path “/System/Translation Model Framework/_Templates/”.
Auto Link Locales
Note: This is an optional step.
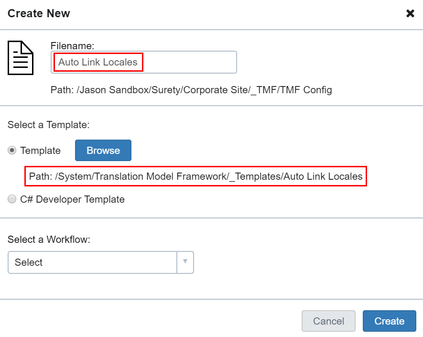
- Create a new file under “TMF Config” folder.
- Enter “Auto Link Locales” as the label. Select “Auto Link Locales” for the template name in “/System/Translation Model Framework/_Templates/”. It is not necessary to select a Workflow.
Implementations
There are two ways of enabling the TMF in the CMS project:
Using Component Library Template Definitions
If the project is implemented in the Component Library framework, you can enable TMF in each template definition.
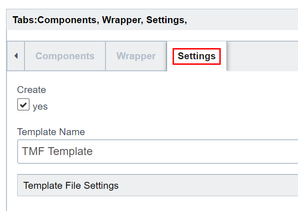
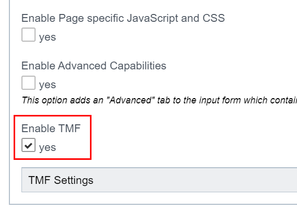
From the Settings tab, tick the Enable TMF checkbox, and click Save. DXM will create TMF related files and update the template files.
Manually update the custom templates
If the template was created manually, then you will need to open each template file and add the following code:
input.aspx – Add the below code at the end of the file:
<% try { ServicesTMF.Input.LoadInput(asset, context); } catch (Exception ex){} %>
output.aspx – Add the below code at the end of the file:
<% try { ServicesTMF.Output.LoadOutput(asset, context); } catch (Exception ex){} %>
output_changes.aspx – Add this file if it does not exist and add the below code:
<% try { ServicesTMF.Output.LoadMasterAssetChanges(asset); } catch (Exception ex){} %>
post_input.aspx – Add this file if it does not exist and add the below code:
<% try { ServicesTMF.PostInput.LoadPostInput(asset, context); } catch (Exception ex){} %>
post_save.aspx – Add this file if it does not exist and add the below code:
<% try { ServicesTMF.PostSave.LoadPostSave(asset, context); } catch (Exception ex){} %>
Relationships Config
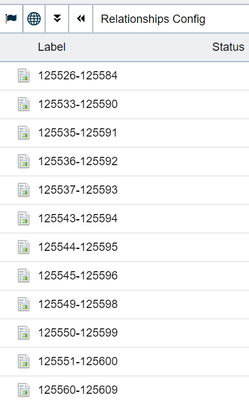
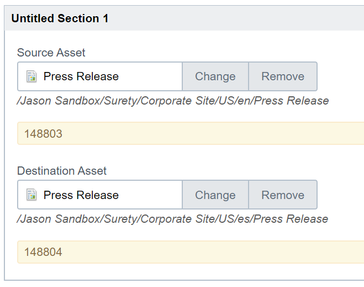
When TMF is triggered, it creates a relationship configuration asset under the /Relationships Config folder. Each asset represents the relationship between the Source Asset and the Destination Asset.
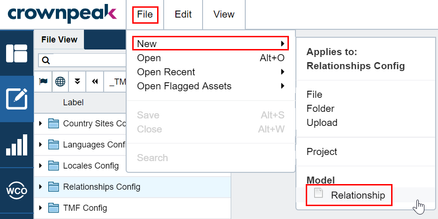
To manually create a relationship between the two assets, use the Relationship model in the /Relationships Config folder.
Warning: If you delete the config asset, you can break the existing relationship.
Auto Link Locales
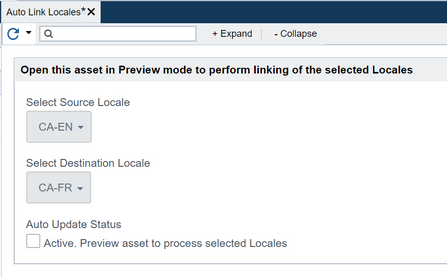
If you have an English and French folder using the same structure and templates that haven't been linked, you can use the Auto Link Locales feature, which will create the relationship between the two folders.
Tick the Auto Update Status checkbox, click Save, and then preview the asset. DXM will create the relationship and show you a table with the relationship status.
Compare Contents
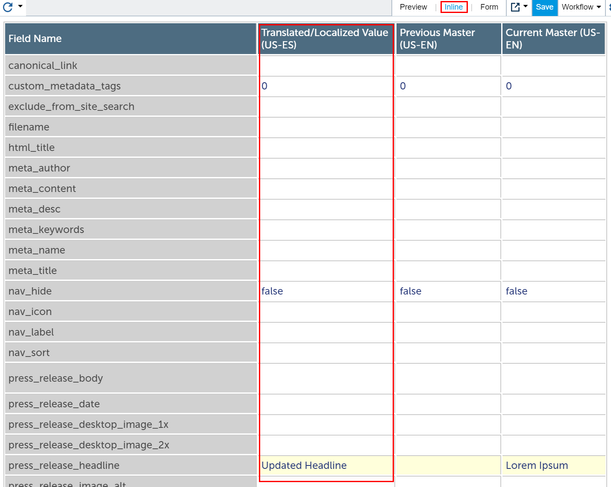
TMF provides a comparison table that shows all fields from the master and derived content, and highlights any content changes. Click one of the derived assets and select Show Master Changes in the dropdown list.


Click the Inline. You can compare each value and make changes if needed. Translated/Localized Value column is only editable.
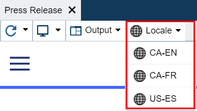
The locale dropdown will give you access to the other locale pages.
Workflow
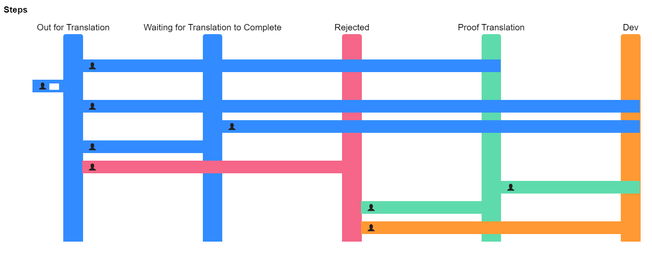
If you have a translator or translator vendor, it would require updating the existing workflow. Below is a generally used workflow sample. Out for Translation status is what we typically add right before the approval process.

This is an additional workflow for the translation. Once the status is set to Out for Translation on the previous step, the asset is transferred to this workflow, follow the steps and move back to the original workflow.
Here are three examples for how translation content can be processed:
- Translation Vendor - Generate data file such as XML or JSON that is sent to the translation vendor via SFTP. Setup an SFTP location where CMS can export & import the file. Translated content will be updated automatically. Please contact your Customer Success Manager for more information about Translation Vendors.
- Independent Translator with CMS Access - Give translator access to the CMS, so they can make content updates directly. If the project needs to restrict access to certain input fields for the translator, significant effort is required.
- Independent Translator with No CMS Access - Build a separate authoring experience application outside the CMS using the CMS Access API. It’s not recommended here because this requires significant effort. A custom-built app is not ideal for a long-term support.
In summary, TMF allows you to control multilingual content within DXM, then connect with translators or translation vendors, and finally give you efficient ways to compare and manage translated content. It also notifies content owners, so they can keep track of all the changes.
You should now know what to expect when you setup and use TMF. We know some projects have different and unique needs for the translation process. Please contact either your Customer Success Manager or Crownpeak Support team if you have any additional questions or concerns.


